This guide provides detailed steps for handling voicemails in the Omnia Admin Portal. It includes accessing voicemail lists, creating new voicemails, enabling email delivery and storage, editing, configuring greetings, managing messages, and deleting voicemails. Voicemail allows callers to leave recorded messages when recipients are unavailable, ensuring efficient communication through accessible and personalized message management.
Accessing Voicemails
- Navigate to Voicemails:
- Go to the Admin Portal and sign in.
- Click the Phone System tab to expand it, then select Voicemails.

Voicemail Overview
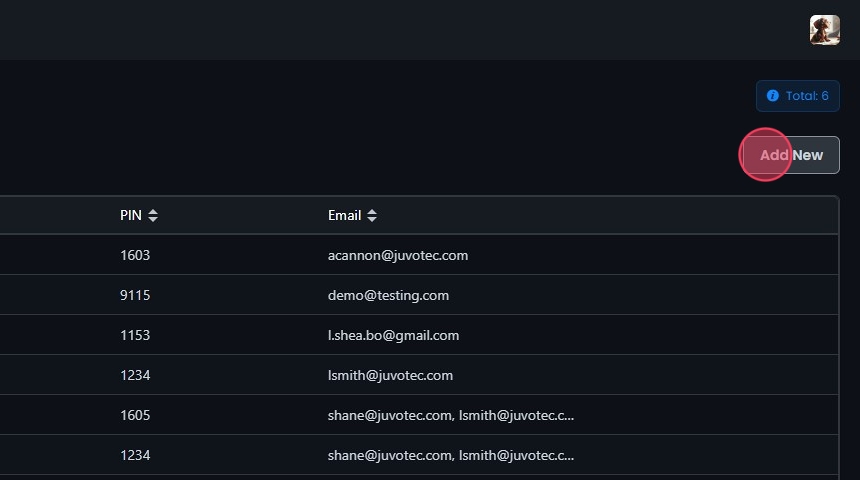
- Voicemail List:
- You can view details for each mailbox, such as:
- Mailbox: The number assigned to each voicemail box.
- Name: The name of the user associated with the mailbox.
- PIN: The Personal Identification Number for accessing voicemail.
- Email: The email address where voicemail notifications are sent.
- Search and Export: Use the Search and Export functions to find specific mailboxes or to export the list.
- Sort: Click the sort icons next to column headers to arrange items in ascending or descending order.

Creating a Voicemail
- Create a Voicemail:
- Click Add New.
- Enable email delivery and storing voicemails:
- Enable Email Delivery: Check this option to have voicemails delivered to an email address. Uncheck it if you do not want this feature.
- Enable Storing Voicemails: Check this box to store voicemails after successful email delivery, allowing admins and users to manage them in Omnia. If left unchecked, voicemails will not be stored for management.

- Enter Details:
- Full Name: Enter the full name associated with the voicemail.
- Mailbox Number: Assign a unique mailbox number.
- Email: Provide an email address for email delivery (if enabled). To send each voicemail email to more than one recipient, enter multiple addresses separated by commas.
- Notify Numbers: Optional. Enter one or more phone numbers (comma-separated) to receive an automated voice-call notification each time a new voicemail lands in this mailbox. This is a phone call, not a text message.
- PIN: Set a PIN for accessing the voicemail.

- Virtual Receptionist Settings:
- Allow IVR Options: Check this box to enable IVR options.
- Select IVR: Choose the IVR to be used.
- Destination Type: Select the type of destination.
- Select Destination: Choose the specific destination. The operator can be dialed by pressing the 0 key.

If a caller presses 0 during the greeting and the greeting just repeats instead of transferring, the Operator destination on this voicemail box is blank — with no destination set, there is nowhere to route the caller, so the greeting replays. Set the Operator destination and save. Each voicemail box has its own Operator setting, so repeat this for every box that needs the press-0 option.
- Save the Voicemail:
- Click Create, then Yes to confirm and save.

Viewing and Editing Voicemails
- Edit Voicemails:
- Click on the Voicemail you want to edit or click the Edit button next to it.
- Modify items such as the PIN and timezone.
- Record, upload, or assign existing greeting messages.
- Manage, listen to, download, and delete voicemails.

Configuring Voicemail Greetings
- Configure Voicemail Greetings:
- Click Greetings.
- Greeting Types:
- Name Greeting: Identifies your extension.
- Unavailable Greeting: Plays when you do not answer.
- Busy Greeting: Plays when you are on the phone.
- Out of Office Greeting: Overrides your unavailable and busy greetings.
- Choose from existing media files, record, or upload new files for each greeting type.

- Select Greeting from Media File:
- Click From media file.
- Click the Select a greeting dropdown and pick from an existing media file.
- Playback: Click to play the media file.
- Download Greeting: Click to download.
- Save as current: Click to save the selected media file as your new greeting.
- Remove greeting: Once saved, click to delete the media file. Click Yes to confirm.

- Select Greeting - Record or Upload:
- Click Record or Upload.

- Record or Upload:
- Press and Hold To Record: Click and hold to record a message.
- Upload File: Click to add an existing audio file.
- Playback: Click to play the media file.
- Cancel Changes: Click to revert to previous settings.
- Save as current: Click to save the recorded or uploaded file.
- Remove greeting: Once saved, click to delete the media file. Click Yes to confirm.

- Save Changes:
- Once you have finished making your edits, click Save.
- Click Yes to confirm.

Managing Voicemail Messages
- Viewing Messages:
- Go to the Messages tab to see a list of all voicemail messages.
- You can view details such as the date, time, caller’s name, number,and theduration of each message.

The Messages tab lists the voicemails currently stored in the mailbox. Voicemails age out of the system over time, so older messages may no longer appear here — and once a message has aged out, it can’t be retrieved. To keep a permanent copy of every voicemail, turn on Enable Email Delivery for the mailbox (step 4 above) so each new message is sent to your inbox with the audio file attached, which you can save and replay any time.
- Playing and Saving Messages:
- Click the music note next to a message to play it.
- In the Voicemail Message window, you can listen to the message and save the recording if needed.

- Deleting Messages:
- Select a message and click Delete to remove it.
- Confirm the deletion by clicking Yes.

Deleting Voicemails
- Delete a Voicemail:
- Click the Delete button next to the Voicemail.
- Confirm the deletion by clicking Yes.
