This guide provides step-by-step instructions on how to add new accounts within the Omnia Admin Portal.
This document applies to the following user roles within Omnia:Partner Administrator
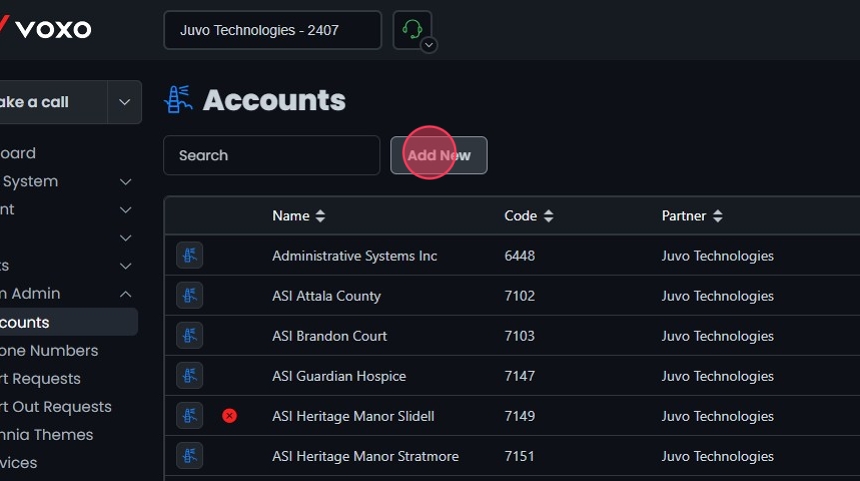
Accessing System Admin - Accounts
- Navigate toSystem Admin - Accounts:
- Go to the Admin Portal and sign in.
- Click the System Admin tab to expand it, then select Accounts.

Creating a New Account
- Add New:
- To add a new account, click the Add New button.
- Only Partner Admins can create new accounts.
General
- General Settings:
- After clicking the Add New button, you will be taken to the General Settings tab.
- Fill in the required fields:
- Enforce Two-Factor Authentication for organization: Check this box if you want to enforce two-factor authentication.
- Residential Account: Check this box if the account is residential.
- Enter name: Type the account name. This name will be used as the default caller ID.
- Enter billing id: Type the billing ID.
- Select time zone: Choose the appropriate time zone from the dropdown menu.
- Bill Start Date: Click on the calendar icon to select the bill start date.
- Billing Information (May not be required): Enter the billing details, which may include:
- First Name
- Last Name
- Email
- Phone Number
- Address: Use the search bar to find and enter the address.
- Register SMS Brand: Check this box if you need to register an SMS brand.

- SMS Brand Registration:
If you checked the Register SMS Brand box, fill in the additional fields required for SMS brand registration:
- Organization Type: Select the organization type from the dropdown menu (e.g., Government, Non-Profit, Private Profit, Public Profit).
- Brand Vertical: Select the brand vertical from the dropdown menu (e.g., Agriculture, Communication, Construction).
- Company Name
- EIN
- Street
- City
- State
- Postal Code
- Country
- Email
- Phone
- Website

Pricing
- Pricing Settings:
Navigate to the Pricing tab.
Fill in the pricing details for the voice products:
-
Unlimited Extension
-
Toll Free Minutes
-
SIP Trunk
-
Fax Service
-
International Minutes
-
Live Transcription Service
For custom products, select the product from the dropdown menu, and enter the price and quantity:
-
Product: Select from options such as Managed Services or Internet.
-
Price: Enter the price.
-
Quantity: Enter the quantity.
-
Description: Enter a description for the custom product.
-
Click Add a product to include additional custom products.
Check the Verify product pricing box to ensure all product pricing is accurate before saving.

Conduits
- Adding Conduits:
- Navigate to the Conduits tab.
- Enter the Conduit Prefix. Note that conduits only work when dialing 6 digits or less.
- Select the conduits to assign:
- Use the Available list to search and select conduits. Only accounts with conduit prefixes are listed.
- Move selected conduits to the Assigned list using the arrow buttons.
Conduits allow extensions to dial extensions in other accounts by using a prefix and the extension number. This feature enables users from multiple accounts to communicate via extension-to-extension dialing as if they were all part of the same account, facilitating easy internal communication across different departments or locations.

Create Account
- Create Account:
- After filling in the necessary details, click the Create button.
- A warning message will appear: “Confirm Basic Account Creation?” Click Yes to confirm or No to cancel.
