A “Short Number” is a 2-5 digit code that allows users to reach specific destinations without dialing the full 10-digit number. For example, office staff can transfer calls to a field technician’s cell phone using a short number like “02” instead of the full number. This guide provides step-by-step instructions for managing short numbers in the Omnia Admin Portal.
This document applies to the following user roles within Omnia:Account Administrator
Partner Administrator
Accessing Short Numbers
- Navigate to Short Numbers:
Go to the Admin Portal and sign in.
Click the Phone System tab to expand it, then select Short Numbers.

Adding New Short Numbers
- Add a New Short Number:
Click Add New to create a new short number.

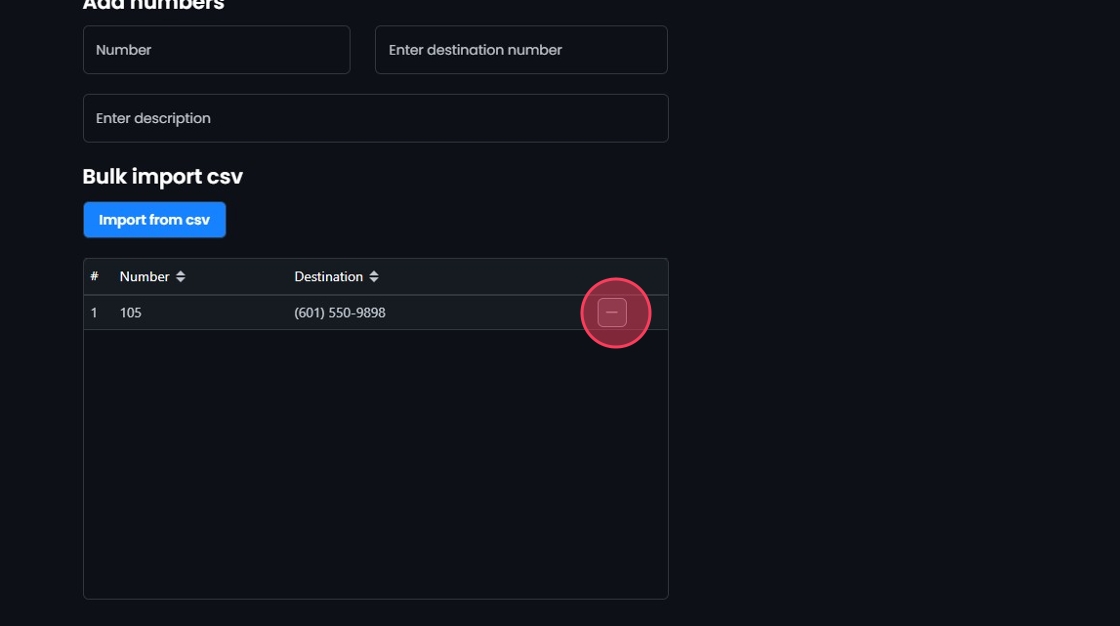
- Add Numbers:
- Number: Enter a number in the Number field. The number length must be at least two characters long.
- Destination Number: Enter the destination number in the Enter destination number field.
- Description: Enter a description in the Enter description field.

- Add Entries:
- Click Add (+) to add an entry.
- Click the Clear to remove an entry before adding it to the list.
- You can continue to add multiple numbers by following this process. Added entries will appear in the list below.

- Remove an Entry:
- If you need to remove a number from the list after selecting add, clicking Remove (-) will remove an entry before saving.
- Save Entries:
- Once you have completed adding entries, click Create.
- Click Yes to confirm and save.

Bulk Adding Short Numbers
- Import from CSV:
- Hover over Import from csv and click Download example csv to get a template to add your numbers in bulk.
- Complete the template, save it, and click Import from csv to upload the spreadsheet.

- Map CSV Fields:
- Select number, destination, and description from the dropdown menus for each corresponding column.
- All listed fields must be selected to continue.
- Click Reset to remove the CSV and reupload if needed.
- Click Add.
- Added entries will appear in the list below.

- Remove an Entry:
- If you need to remove a number from the list after selecting add, clicking Remove (-) will remove an entry before saving.

- Save the Short Numbers:
- Once you have completed adding entries, click Create.
- Click Yes to confirm and save.

Editing Short Numbers
- Edit Short Numbers:
- Click on the short number you want to edit or click the Edit button next to it.
- Make your edits.
- Click Save.
- Click Yes to confirm and save your changes.

Deleting Short Numbers
- Delete a Short Number:
- Click the Delete button next to the Short Number.
- Click Yes to confirm the deletion.

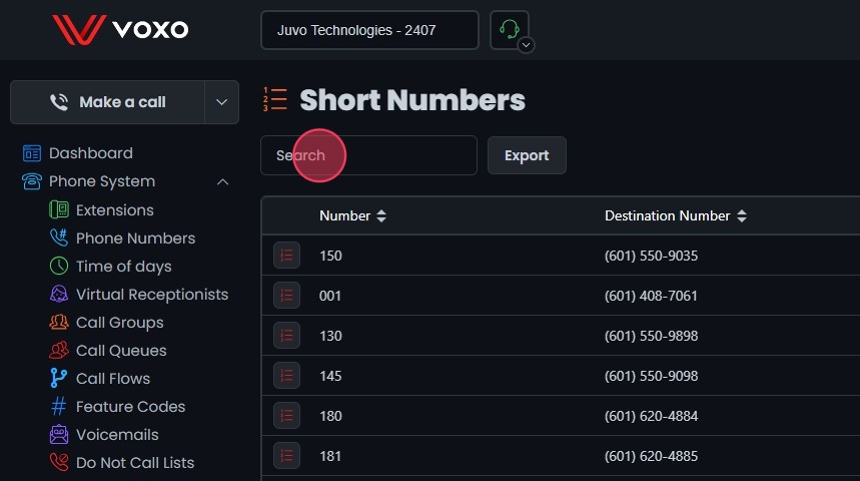
Search and Sort
- Search Short Numbers:
- Search Bar: Quickly find specific items by typing the name or a keyword in the search field. The system will filter the list based on your search input, displaying the relevant results.
- Sort: Click the sort icons next to column headers to arrange items in ascending or descending order.
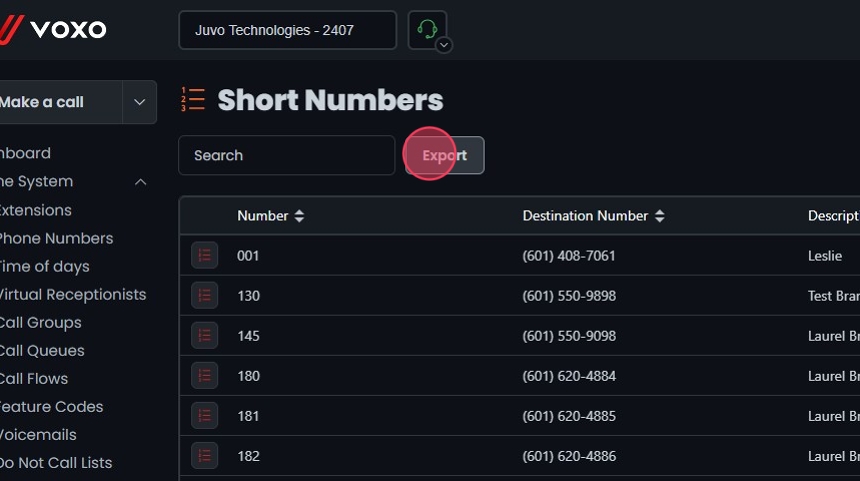
Exporting Short Numbers
- Export Short Numbers:
- Click the Export button next to the search field.
- The system will download a list of the items in CSV format.