Omnia Admin Reports: IVR Summary
This document provides a concise guide for accessing and utilizing the IVR Summary report in the Omnia Admin Portal. It details steps to navigate the reports section, filter data by date range, and understand key metrics such as unique entries, loop ratio, and key press statistics. Additionally, it explains how to export the summary data for further analysis. This guide ensures efficient monitoring and management of IVR activities within the Omnia platform.
Alert: Access to this Report:
- Access to this report is based on your user role. You may not be able to access and view a specific report and all of its features if your role does not permit it.
Accessing the IVR Summary
1. Navigate to the Reports Section:
- Go to the Admin Portal and sign in.
- Click the Reports tab to expand it.
- Select Virtual Receptionists, then IVR Summary.

IVR Summary
2. IVR Summary:
- Displays summary data of IVR system activities.
- The initial results shown will be for today's date.

3. Column Headers:
- Unique Entries: Number of distinct entries.
- Total Entries: Total number of entries.
- Loop Ratio: Ratio of repeated entries.
- Valid Key Total: Total valid key presses.
- Valid Key %: Percentage of valid key presses.
- Wrong Key Total: Total wrong key presses.
- Wrong Ext Dial: Total wrong extension dials.
- Wrong Key %: Percentage of wrong key presses.
- Extension Dial Total: Total extension dials.
- Ext Dial %: Percentage of extension dials.
- Hangups Total: Total number of hangups.
- Hangup %: Percentage of hangups.
- Time Outs Total: Total number of timeouts.
- Time Out %: Percentage of timeouts.
- Sort Columns: Click on any column header to sort the data by that column.

Filtering the Data
4. Select a Date Range:
- Quick Selection Options: Click on one of the provided buttons to quickly select the desired date range:
- Yesterday: View the data from the previous day.
- Last 10 Days: View the data from the past 10 days.
- Last 30 Days: View the data from the past 30 days.

5. Select Date Range:
- Use the calendar to select the start and end dates.
- Click the Filter button.
- Set Date Range and Time:
- Choose the start date and set the time.
- Choose the end date and set the time.
- Use predefined options (e.g., Last week) for quick selection.
- Confirm: Click OK to apply.

6. Filter Settings:
- Select Distribution: Choose how you want the data to be distributed (Hourly, Daily, Monthly, None).
- Filter By: Select Virtual Receptionists from the dropdown menu.
- Select IVRs: Click the dropdown and select the desired IVRs.
- Update: Click the Update button to apply all changes.

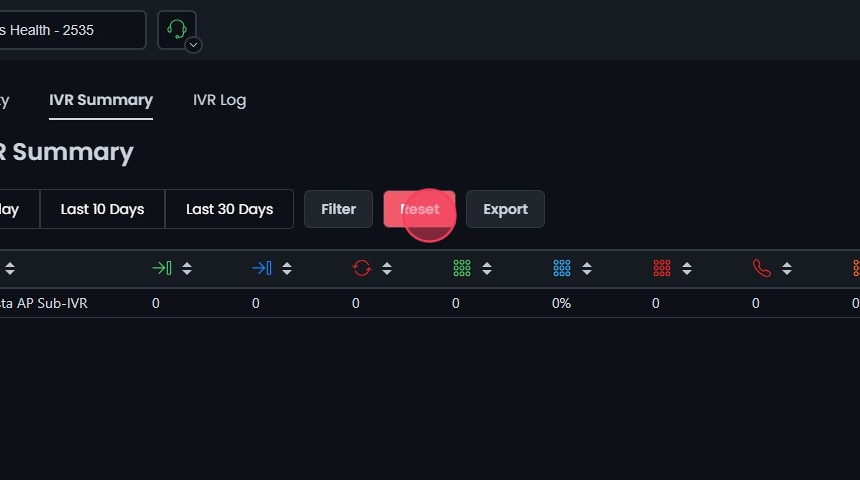
7. Reset Filters:
- Click Reset to remove your filters and start over if needed.

Exporting the IVR Summary
8. Export Data:
- Click the Export button to download the summary data in CSV format.

