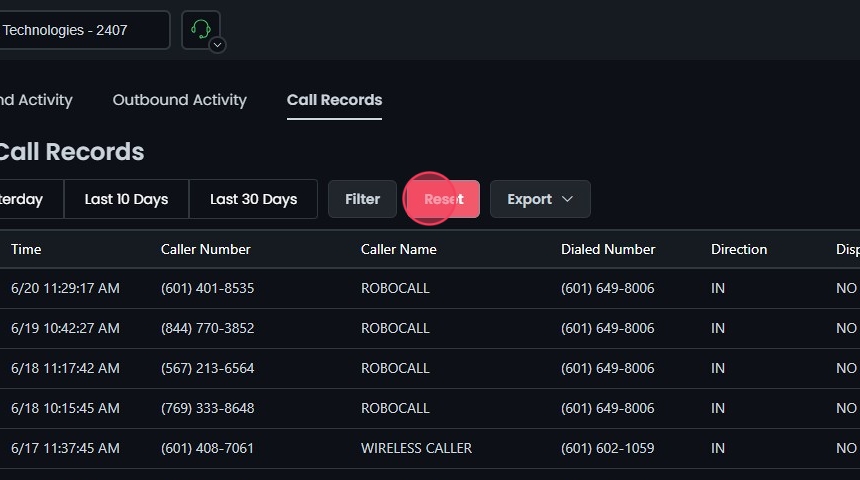
Omnia Admin Reports: Call Records
This guide provides step-by-step instructions on how to access, view, and manage call records within the Omnia Admin Portal.
Alert: Access to this Report:
- Access to this report is based on your user role. You may not be able to access and view a specific report and all of its features if your role does not permit it.
Accessing Call Records
1. Access the Call Records Report:
- Go to the Admin Portal and sign in.
- Click the Reports tab to expand it.
- Select Call Summary, then Call Records.

Viewing Call Records
2. View Call Records:
- The table displays the following columns:
- Time: The time the call was made.
- Caller Number: The number of the caller.
- Caller Name: The name of the caller.
- Dialed Number: The number dialed.
- Direction: The direction of the call (inbound or outbound).
- Disposition: The call's outcome (answered, no answer, busy, failed).
- Presented: Indicates if the call was presented to the user.
- Duration: The duration of the call.
- Who Answered: The person who answered the call.
- Outcome: The result of the call.
- Packet Loss: The percentage of packet loss during the call.
- Jitter: The jitter during the call.
- MOS: The Mean Opinion Score for the call quality.
- The initial results shown will be for today's date.

Filtering Call Records
3. Preset Filters:
- Use the Yesterday, Last 10 Days, or Last 30 Days buttons to quickly filter the call records.

4. Filter Settings:
- Click Filter to open the filter settings.

5. Select Date Range:
- Choose the start and end dates to define the period for which you want to view the call records.
- You can use preset options like Last Week, Last Month, Last 3 Months, Last 6 Months, and Last Year.
- In addition to the date range, you can also filter by a specific time range within the selected dates.

6. Clear Filters:
- Click Clear to remove the filters if needed. This allows you to start over while picking from your date ranges.

7. Advanced Filters:
- Select the call direction, filter by specific criteria (branch, phone number, caller name, etc.), dispositions (answered, no answer, busy, failed), and whether the call was presented.
- Presented means a call attempted to reach a user.

8. Apply Filter:
- Click Update to apply the filter settings.
- The details will be displayed on the screen based on your filters.

9. Reset Filters:
- Click Reset to remove your filters and start over if needed.

Exporting Call Records
10. Export Call Records:
- Use the Export button to download the call records data in CSV format.
- Click OK to confirm the export.

Scheduling Call Record Reports
11. Schedule a Report:
- Click the Export button.
- Select Schedule Report from the dropdown.

12. Configure Report Settings:
- Enter a name for the report.
- Add recipient email addresses. Use commas to separate multiple emails.
- Select the report frequency: Daily, Weekly, or Monthly.
- Review the current filter settings.
- Click Schedule to save the report schedule.
- For more information, see the Scheduled Reports section.

Accessing the Call Flow View
13. View Call Flow:
- Click on a specific call record or click the call flow icon next to a call record to open the call flow view for that record.

Understanding the Call Flow View
14. Call Flow View Details:
- The Call Flow View provides a visual representation of the call's journey from start to finish. It includes the following elements:
- Unique ID: A unique identifier for the call.
- Caller Number: The number of the person who initiated the call.
- Number Dialed: The number that was dialed.
- Start Time: The time when the call started.
- Duration: The total duration of the call.
- Disposition: The outcome of the call (e.g., answered, no answer).

15. Flowchart Path:
- The flowchart shows the path of the call through various stages, such as:
- Dial: The call is dialed out to the specified number.
- Answer: The call is answered.
- Hangup: The call is terminated by either party.
- Note: The provided flowchart is an example of an outbound call. The stages and details may vary based on the direction and nature of the call.
- Each stage is accompanied by details such as the time taken to reach the next stage, providing a comprehensive view of the call's progression.

