
The Call Recordings report allows you to view and filter call recordings within Omnia. This guide provides step-by-step instructions on how to access and view call recordings in the Omnia Admin Reports. It includes information on filtering the recordings, playing and saving them, and accessing the call flow view.
Alert: Access to this Report:
- Access to this report is based on your user role. You may not be able to access and view a specific report and all of its features if your role does not permit it.
Accessing Call Recordings
1. Access Call Recordings:
- Go to the Admin Portal and sign in.
- Click the Reports tab to expand it, then select Call Recordings.

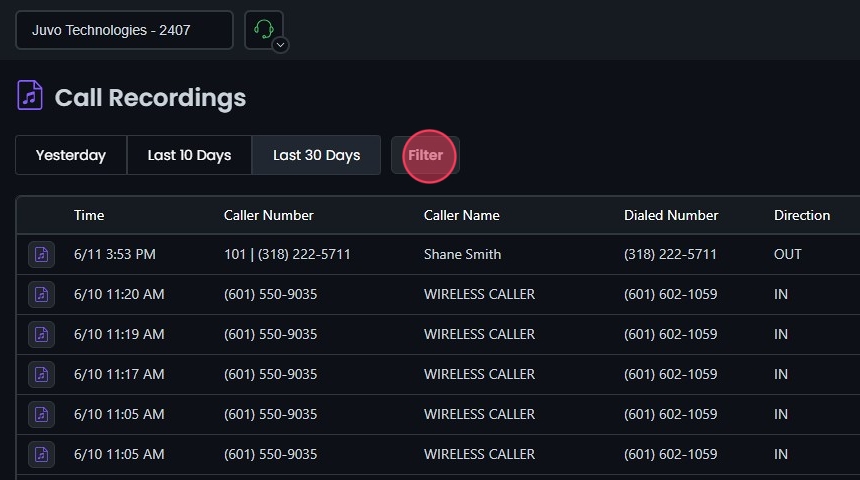
Viewing Call Recordings
2. View Call Recordings:
- The call recordings are displayed in a table with columns for Time, Caller Number, Caller Name, Dialed Number, Direction, Disposition, Duration, Who Answered, Packet Loss, and Jitter.
- Initially, the results shown are for today's date.

Filtering Call Recordings
3. Preset Filters:
- Yesterday: Click this button to quickly filter data from the previous day.
- Last 10 Days: Click this button to quickly filter data from the last 10 days.
- Last 30 Days: Click this button to quickly filter data from the last 30 days

4. Filter Settings:
- Click Filter to open the filter settings.
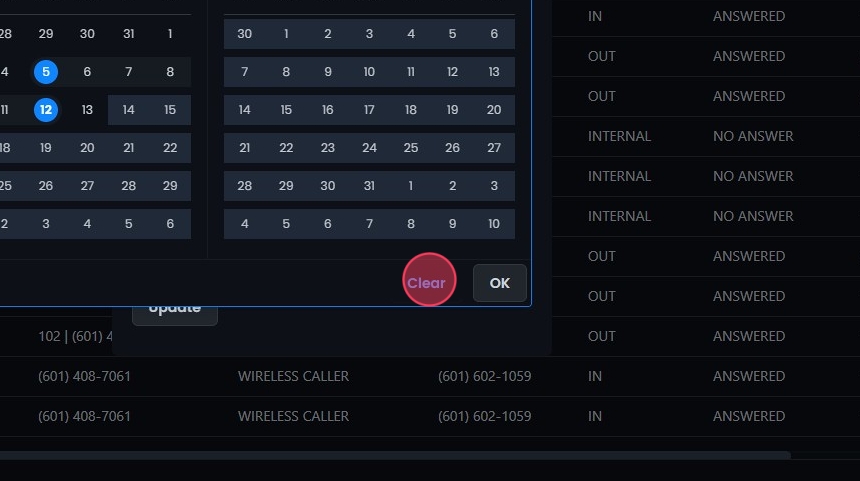
5. Select Date Range:
- Choose the start and end dates to define the period for which you want to view the Call Recordings.
- You can also use the preset options like Last Week, Last Month, Last 3 Months, Last 6 Months, and Last Year.
- In addition to the date range, you can also filter by a specific time range within the selected dates.

6. Clear Filters:
- Click Clear to remove the filters if needed. This allows you to start over while picking from your date ranges.
7. Select Call Direction:
- Choose the direction of the calls you want to filter (Inbound, Outbound, Internal, All).

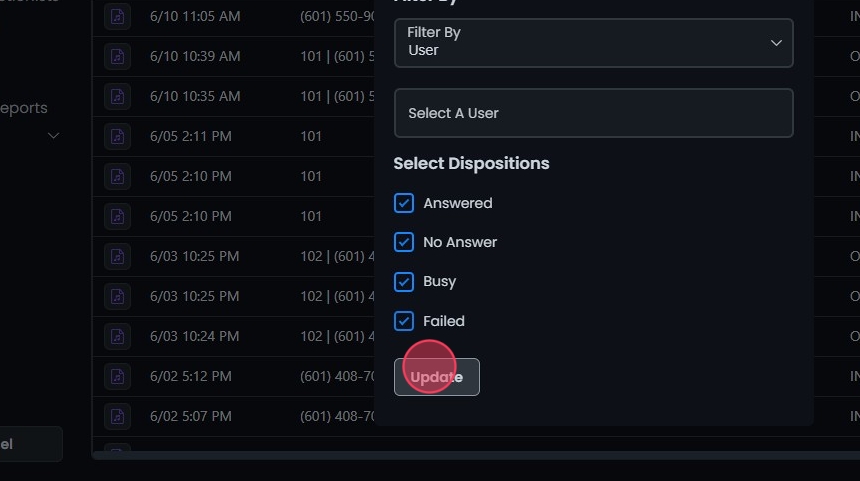
8. Filter By:
- Choose additional filters such as Branch, Caller Name, Phone Number, Call ID, or User to narrow down the results further.
- Enter specific criteria based on the selected filter.

9. Select Dispositions:
- Check the boxes for the call outcomes you want to filter by (Answered, No Answer, Busy, Failed).

10. Apply Filter:
- Click Update to apply the filter settings.
- The details will be displayed on the screen based on your filters.
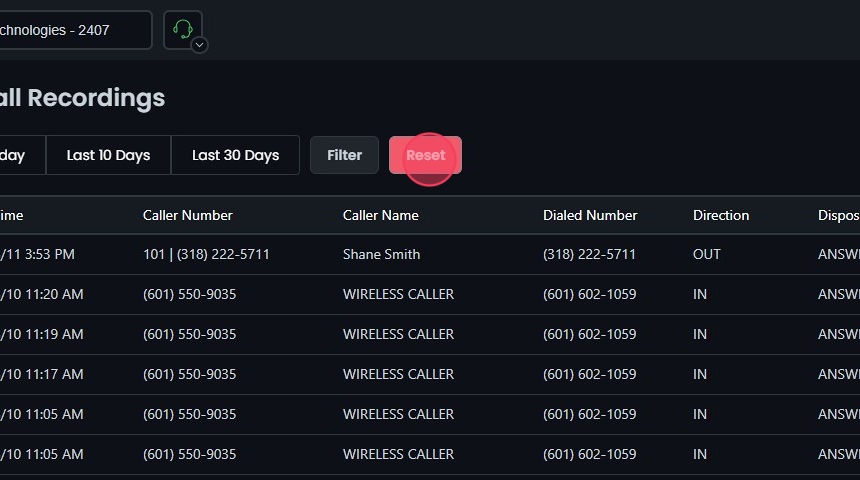
11. Reset Filters:
- Click Reset to remove your filters and start over if needed.
Playing and Saving Recordings
12. Playing and Saving Recordings
- Access a Recording: Click on a call recording in the displayed list or click the music note next to a call recording.
- Playback Controls: A popup will appear with details of the recording, including Unique ID, Start Time, Caller Name, Caller Number, Dialed Number, Disposition, and Duration.
- Play Recording: Use the play button to listen to the recording.
- Save Recording: Click the Save recording button to download the recording.

Accessing Call Flow View
13. Call Flow View:
- Access Call Flow View: Click the call flow icon next to a call recording record. This will open the detailed call flow view, providing insights into the specific call path and related actions taken during the call.
- Call Flow Details: A popup will display the call flow details, including Unique ID, Start Time, Caller Number, Dialed Number, Disposition, and a graphical representation of the call flow.

Understanding the Call Recordings Table
14. Understanding the Call Recordings Table:
- Time: Shows the timestamp of the call.
- Caller Number: Displays the number of the caller.
- Caller Name: Shows the name associated with the caller.
- Dialed Number: Displays the number that was dialed.
- Direction: Indicates the direction of the call (Inbound, Outbound, Internal).
- Disposition: Describes the outcome of the call (Answered, No Answer, Busy, Failed).
- Duration: Displays the length of the call.
- Who Answered: Shows the name or extension of the person who answered the call.
- Packet Loss: Indicates the percentage of packet loss during the call.
- Jitter: Displays the amount of jitter (variation in packet arrival times) during the call.
