Custom destinations are call routing specifications defined by a system administrator, such as forwards to external numbers. They can be used across various features in Omnia to route phone numbers, IVRs, and other call handling elements. This guide explains how to manage custom destinations in the Omnia Admin Portal, including adding, editing, deleting, searching, and exporting them.
Alert: This document applies to the following user roles within Omnia:
- Account Administrator
- Partner Administrator
Accessing Custom Destinations
1. Navigate to Custom Destinations:
-
Go to the Admin Portal and sign in.
-
Click the Phone System tab to expand it, then select Custom Destinations.

Adding New Custom Destinations
2. Add a New Custom Destination:
- Click the Add New button to create a new custom destination.
- In the Enter name field, type a descriptive name for the custom destination. This helps in easily identifying the purpose of this configuration later.

3. Select the Destination Type:
- Click on the Select type dropdown menu to choose the action you want to configure. The available options include:
- Alter caller ID: Change the caller ID for the incoming call.
- Forward call to: Forward the call to another number.
- Send a text message: Send a predefined text message.
- Send call to queue at position: Place the call in a queue at a specified position.
- Read a tag: Read a specific tag associated with the call.
- Route by previous call: Route the call based on the previous call's handling.
- Tag a call: Apply a tag to the call for identification or tracking purposes.

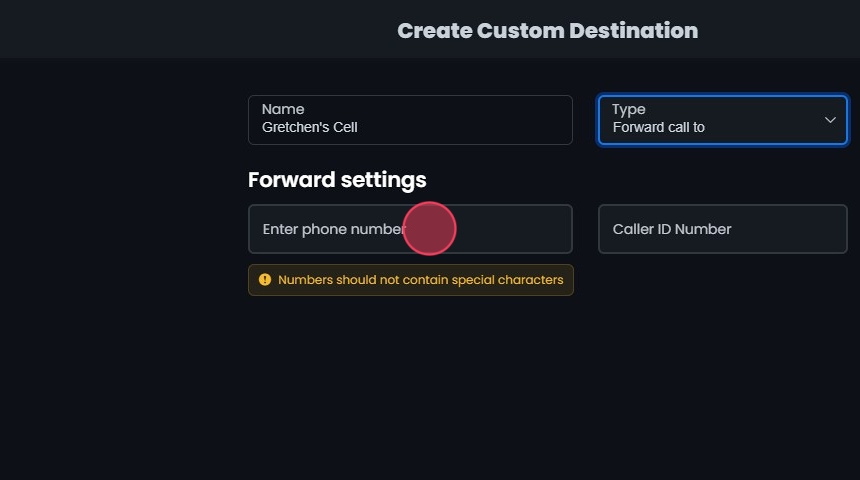
4. Configure Additional Details:
- Depending on the selected type, additional fields may appear. Fill in these fields as required. For example:
- If you choose Forward call to, enter the number to which the call should be forwarded.
- If you select Send a text message, provide the text message content.
5. Save the Custom Destination:
- After filling in all necessary details, review your entries for accuracy.
- Click Create then Yes to save the custom destination.

Editing a Custom Destination
6. Edit a Custom Destination:
- Click on the custom destination you want to edit or click on the Edit button next to it.
- Make your edits.
- Click Save.
- Click Yes to confirm and save your changes.

Deleting Custom Destinations
7. Delete a Custom Destination:
- Click the Delete button next to the Custom Destination.
- Confirm the deletion by clicking Yes.

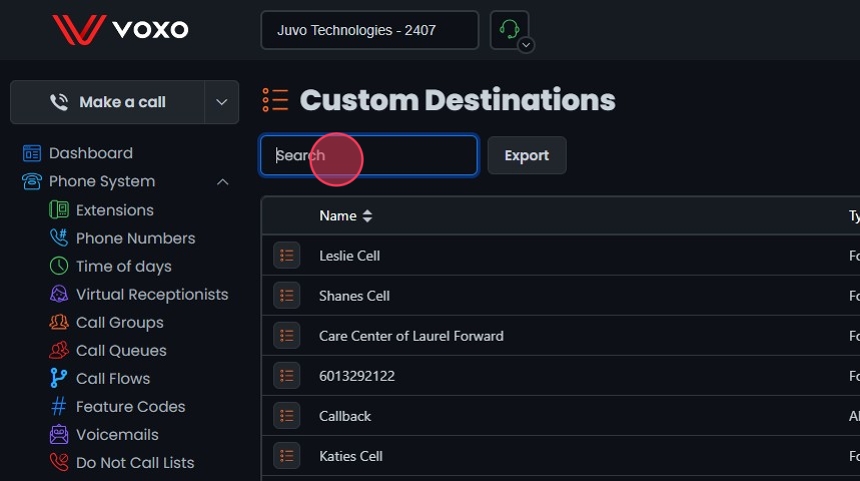
Search and Sort
8. Search Custom Destinations:
- Search Bar: Quickly find specific items by typing the name or a keyword in the search field. The system will filter the list based on your search input, displaying the relevant results.
- Sort: Click the sort icons next to the column headers to arrange items in ascending or descending order.
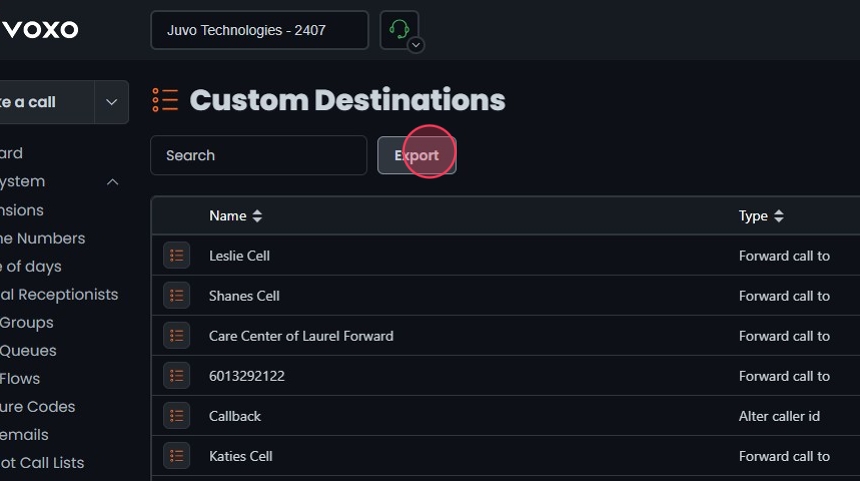
Exporting Custom Destinations
9. Export Custom Destinations:
- Click the Export button next to the search field.
- The system will download a list of the items in CSV format.